Crunchy Delights: A Step-by-Step Guide on How to Make Granola
- Gather the Ingredients
- Preheat the Oven
- Prepare the Dry Ingredients
- Mix in the Wet Ingredients
- Add Sweeteners and Flavorings
- Combine the Mixture
- Spread the Granola on a Baking Sheet
- Bake the Granola
- Stir the Granola
- Continue Baking and Stirring
- Remove from the Oven and Cool
- Add Optional Mix-ins
- Store the Granola Properly
- Enjoy Your Homemade Granola
Granola is a delightful and versatile breakfast option that can also be enjoyed as a snack or used as a topping for yogurt or desserts. Making your own granola at home allows you to customize the flavors and ingredients to suit your taste preferences. Not only is homemade granola healthier than store-bought versions, but it also fills your kitchen with the irresistible aroma of toasted oats and nuts. In this step-by-step guide, we will walk you through the process of making crunchy and delicious granola right in your own kitchen. Get ready to embark on a culinary adventure that will leave you craving more!
Gather the Ingredients
Gathering the ingredients is the first step to creating a delicious batch of homemade granola. Here's what you'll need:
1. Rolled oats: These will serve as the base for your granola, providing a hearty and crunchy texture.
2. Nuts and seeds: Choose your favorites such as almonds, walnuts, pecans, or sunflower seeds to add extra crunch and nutritional value.
3. Dried fruits: Options like raisins, cranberries, or chopped apricots will bring sweetness and chewiness to your granola.
4. Coconut flakes: These will add a tropical twist and a delightful crunch to your mix.
5. Honey or maple syrup: These natural sweeteners will help bind the ingredients together while adding a touch of sweetness.
6. Oil: Opt for a neutral-flavored oil like coconut or canola oil to coat the oats evenly.
7. Salt: A pinch of salt will enhance the flavors and balance out the sweetness.
Make sure you have all these ingredients on hand before moving on to the next step in creating your crunchy homemade granola!
Preheat the Oven
3. Preheat the Oven
Before you start making your homemade granola, it's important to preheat your oven. Set the temperature to 325°F (165°C) and allow it to fully heat up. Preheating the oven ensures that your granola will cook evenly and achieve that perfect crunch.
While waiting for the oven to reach the desired temperature, take this time to gather all your ingredients and prepare them accordingly. This way, you'll be ready to move swiftly through the next steps of the granola-making process. So let's get started on creating this crunchy delight!
Prepare the Dry Ingredients
To prepare the dry ingredients for your homemade granola, start by measuring out rolled oats, nuts, and seeds of your choice. In a large mixing bowl, combine the oats with chopped almonds, sunflower seeds, and flaxseeds. You can also add in other nuts like walnuts or pecans for added crunch and flavor. Make sure to mix everything together well so that the ingredients are evenly distributed throughout the granola mixture. Once you have prepared the dry ingredients, you are ready to move on to the next step of making your delicious crunchy granola.
Mix in the Wet Ingredients
After preparing the dry ingredients, it's time to mix in the wet ingredients to create the perfect texture and flavor for your homemade granola. In a separate bowl, combine melted coconut oil or your preferred oil with honey or maple syrup for sweetness. You can also add vanilla extract or any other desired flavorings at this stage. Whisk everything together until well combined. The wet mixture will act as a binding agent, helping to create those delightful clusters of granola. Once mixed, pour the wet ingredients over the dry ingredients and stir until all the dry ingredients are evenly coated. This step ensures that every bite of your granola will be bursting with flavor and crunchiness.
Add Sweeteners and Flavorings
Now that you have combined the dry and wet ingredients, it's time to add some sweetness and flavor to your granola. This step is where you can get creative and customize your granola to your liking.
Start by adding a sweetener such as honey, maple syrup, or agave nectar. These natural sweeteners not only add a touch of sweetness but also help bind the ingredients together. Drizzle about 1/4 cup of your chosen sweetener over the mixture.
Next, it's time to add some flavorings. You can go for classic options like vanilla extract or cinnamon, or experiment with different spices like nutmeg or cardamom. Sprinkle about 1 teaspoon of your desired flavoring over the mixture.
Using a spatula or wooden spoon, gently toss the mixture until all the ingredients are well coated with the sweetener and flavorings. Make sure everything is evenly distributed for maximum taste in every bite.
Adding sweeteners and flavorings is an essential step in making homemade granola that is bursting with deliciousness. It's these little touches that elevate your granola from ordinary to extraordinary. So don't be afraid to get creative and let your taste buds guide you in choosing the perfect combination of sweeteners and flavorings for your granola creation!
Combine the Mixture
Once all the wet and dry ingredients are ready, it's time to combine them. Slowly pour the wet mixture into the bowl of dry ingredients, using a spatula or wooden spoon to gently fold everything together. Make sure every last bit of the dry mixture is coated with the wet ingredients for even flavor distribution.
As you combine the mixture, you'll notice it starting to clump together. This is exactly what we want! The clumps will give your granola that irresistible crunch. Continue folding until all the ingredients are well incorporated and there are no dry pockets left.
Be careful not to overmix, as this can break up those precious clusters. We want a balance between coated oats and loose crumbs. Once everything is combined, take a moment to appreciate the beautiful medley of textures and flavors before moving on to the next step: spreading the granola onto a baking sheet.
Spread the Granola on a Baking Sheet
Once you have combined all the ingredients for your homemade granola, it's time to spread it out on a baking sheet. This step is crucial as it ensures that the granola bakes evenly and achieves that perfect crunch.
Take a large baking sheet and line it with parchment paper or silicone mat to prevent sticking. Pour the mixture onto the prepared baking sheet and use a spatula or your hands to spread it out evenly. Make sure to create an even layer, avoiding any clumps or overlapping.
The size of your baking sheet will determine how thick or thin your granola will be. For chunkier clusters, spread the mixture in a thicker layer. If you prefer a lighter and crispier texture, spread it out more thinly.
Remember not to overcrowd the baking sheet as this can prevent proper air circulation during baking. If needed, divide the mixture between two sheets or bake in batches.
Once you have spread the granola on the baking sheet, it's ready to go into the preheated oven. The next step is crucial for achieving that irresistible golden brown color and delightful crunch we all love in granola.
Bake the Granola
Baking the granola is a crucial step in achieving that perfect crunch and golden color. Once you have spread the mixture evenly on a baking sheet, preheated to 325°F (163°C), it's time to pop it in the oven.
Set your timer for about 20 minutes and let the granola bake. During this time, the heat will work its magic, toasting the oats, nuts, and seeds to perfection. Keep an eye on it though, as ovens can vary in temperature.
After 20 minutes, take out the baking sheet and give the granola a good stir. This will help ensure even browning and prevent any clumps from forming. Place it back in the oven for another 10-15 minutes.
Continue this process of stirring every 10-15 minutes until you achieve that desired level of crunchiness and golden color. It usually takes around 40-50 minutes in total, but keep checking as it can vary depending on your oven.
Once done, remove the baking sheet from the oven and allow the granola to cool completely. It may still feel slightly soft when hot but will crisp up as it cools down.
Remember that granola hardens further as it cools, so don't worry if it seems slightly undercooked when you take it out of the oven. The cooling process is essential for achieving that irresistible crunchy texture we all love.
Now that your homemade granola is baked to perfection, you're one step closer to enjoying a delicious breakfast or snack option packed with wholesome goodness!
Stir the Granola
11. Stir the Granola
After baking for about 15 minutes, it's time to give your granola a good stir. This step is crucial to ensure even browning and prevent any clumps from forming. Use a spatula or wooden spoon to gently mix the granola, making sure to flip over any pieces that are starting to brown.
Stirring the granola also helps to release any moisture trapped inside, allowing it to crisp up evenly. Be careful not to break up any larger clusters that have formed during baking – these will give your granola that irresistible crunch.
Continue baking and stirring every 10-15 minutes until the granola is golden brown and fragrant. This process usually takes around 30-40 minutes in total, but keep an eye on it as oven temperatures may vary.
Remember, patience is key here. Don't rush the process by increasing the oven temperature or skipping the stirring step. Taking the time to stir ensures that every bite of your homemade granola is perfectly toasted and delicious.
Once you're satisfied with the color and texture of your granola, remove it from the oven and let it cool completely on the baking sheet. The granola will continue to crisp up as it cools down, so resist the temptation to dig in right away!
Now that you've mastered the art of stirring your granola, you're one step closer to enjoying a bowlful of crunchy delights. But before we get ahead of ourselves, there's still one more important step left – adding optional mix-ins!
Continue Baking and Stirring
11. Continue Baking and Stirring
Once you have stirred the granola, return it to the oven and continue baking. Set a timer for another 10 minutes. This step is crucial as it ensures that the granola bakes evenly and achieves that perfect crunch.
After 10 minutes, carefully remove the baking sheet from the oven and give the granola another good stir. This helps prevent any clumping and promotes even browning.
Place the baking sheet back in the oven for another 10 minutes. Repeat this process every 10 minutes until the granola turns golden brown and crispy. Keep a close eye on it during these intervals to avoid burning.
The total baking time can vary depending on your oven's temperature and your desired level of crunchiness. On average, it takes about 30-40 minutes for homemade granola to reach its ideal texture.
Remember to stir thoroughly each time you take it out of the oven. This will ensure that all parts of the granola are exposed to heat evenly, resulting in a uniformly crunchy and delicious final product.
Once you're satisfied with the color and texture, remove the baking sheet from the oven and let the granola cool completely before transferring it to an airtight container.
By continuing to bake and stir your granola at regular intervals, you'll achieve that irresistible crunch that makes homemade granola so delightful.
Remove from the Oven and Cool
12. Remove from the Oven and Cool
Once the granola has reached a golden brown color and is fragrant, it's time to take it out of the oven. Be careful as the baking sheet will be hot! Using oven mitts or a kitchen towel, carefully remove the baking sheet from the oven and place it on a heat-resistant surface.
Allow the granola to cool completely before handling or transferring it to a storage container. This will help it crisp up even more and prevent any moisture from getting trapped, ensuring that your granola stays crunchy.
During the cooling process, you may notice that the granola becomes even crunchier as it hardens. Don't worry if it still feels slightly soft when warm; it will firm up as it cools down.
Resist the temptation to dig in right away – patience is key! Letting your homemade granola cool for at least 30 minutes will give you that perfect crunchy texture you're looking for.
While waiting for it to cool, take a moment to savor the delightful aroma filling your kitchen. The combination of toasted oats, nuts, and spices is simply irresistible!
Once cooled, your homemade granola is ready to be enjoyed on its own or mixed with other ingredients like dried fruits, chocolate chips, or yogurt. It can also be used as a topping for smoothie bowls or sprinkled over ice cream for an extra crunch.
Remember to store any leftovers properly to maintain their freshness and crunchiness. But before we get into that, let's explore some optional mix-ins that can take your homemade granola to another level of deliciousness.
Add Optional Mix-ins
Once your granola is cooled, it's time to take it to the next level by adding some optional mix-ins. This is where you can get creative and customize your granola to suit your taste preferences. Consider adding a handful of dried fruits such as raisins, cranberries, or chopped apricots for a burst of sweetness. You can also throw in some nuts like almonds, walnuts, or pecans for added crunch and protein. For an extra indulgent touch, sprinkle in some chocolate chips or coconut flakes. Mix everything together gently to ensure that the mix-ins are evenly distributed throughout the granola. These optional additions will elevate your homemade granola from delicious to extraordinary!
Store the Granola Properly
14. Store the Granola Properly
Once your homemade granola has cooled completely, it's important to store it properly to maintain its freshness and crunchiness. Transfer the granola into an airtight container or a resealable bag. Make sure to remove any excess air before sealing it tightly.
Store the granola in a cool, dry place away from direct sunlight and moisture. The pantry or kitchen cabinet is an ideal spot. Avoid storing it in the refrigerator as the moisture can make the granola lose its crispness.
Properly stored, homemade granola can last for up to two weeks. However, if you want to extend its shelf life, you can store it in the freezer for up to three months. Just make sure to use a freezer-safe container or bag.
When you're ready to enjoy your homemade granola, simply take out the desired amount and let it come to room temperature before serving. This will help restore its delightful crunchiness.
By following these storage tips, you'll be able to savor your homemade granola for longer periods and enjoy its delicious flavors whenever you desire a crunchy delight.
Enjoy Your Homemade Granola
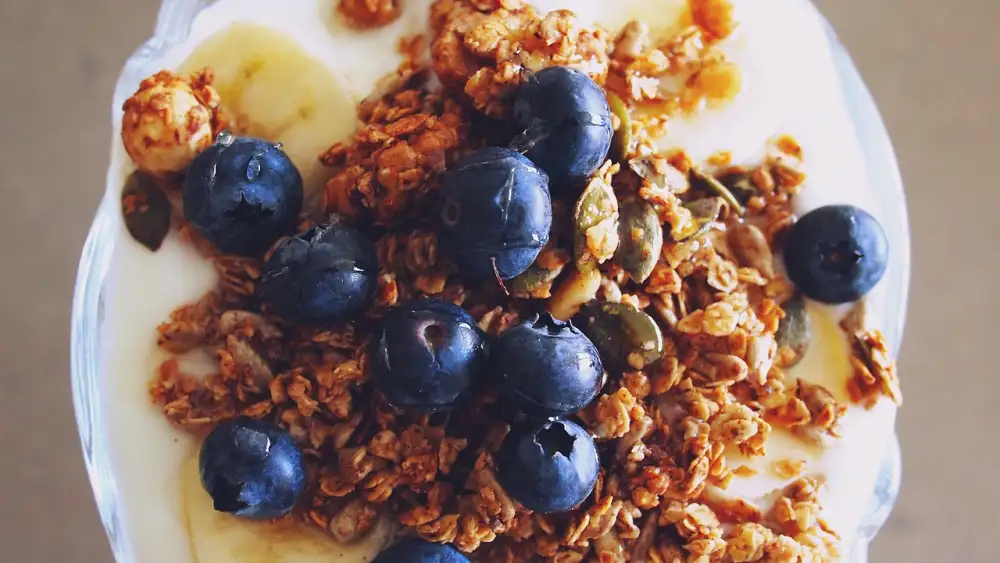
Once your homemade granola has cooled completely, it's time to enjoy the fruits of your labor! Grab a bowl and pour in a generous serving of your crunchy creation. You can enjoy it plain or add some milk or yogurt for a delicious breakfast or snack. The beauty of homemade granola is that you can customize it to your liking by adding your favorite mix-ins such as dried fruits, nuts, or chocolate chips. Get creative and experiment with different combinations to find your perfect blend. Store any leftovers in an airtight container to keep them fresh and crispy for up to two weeks. So go ahead, savor each bite of this wholesome treat and revel in the satisfaction of creating something so delightful from scratch. Enjoy!
Published: 17. 11. 2023
Category: Recipes